
Starlink Bypass Mode Explained: What Is It and How I Use It
Living in an area where traditional broadband is unreliable or nonexistent, satellite internet like Starlink becomes essential. The service has grown fast – from half a million users to over 11 million worldwide – and for many homes it is now the only reliable option.
My first year with Starlink used only the included router. Setup was simple, but the limits became clear quickly: Wi-Fi didn’t reach the back office, settings were very basic, and adding a personal mesh system created conflicts.
That led to researching Starlink Bypass Mode. I found it is the most useful setting for anyone who wants full control over range, speed, and network features.
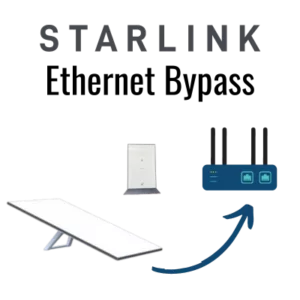
Starlink Bypass Mode disables the routing and Wi-Fi functions of the Starlink router. The dish and base unit become a simple modem that delivers the raw internet feed, while a third-party router handles all network management including DHCP, firewall, QoS, port forwarding, and Wi-Fi broadcasting.
What Is Starlink Bypass Mode?
By default, Starlink acts as both modem and router. The dish talks to the satellites, and the router creates the network and manages devices. Bypass Mode changes that relationship. Once enabled, Starlink provides only the internet connection, and your own router – whether it’s an ASUS, Netgear Nighthawk, TP-Link, Ubiquiti, Eero, or Orbi – takes over 100% of routing duties.
Think of it as switching from automatic to manual control. Starlink delivers the internet; your router decides how to use it.
Why My Network Improved After Switching to Bypass Mode
1. Fixing Double NAT for Gaming, Video Calls, and VPNs
The biggest improvement was fixing double NAT. Double NAT happens when two routers try to manage Network Address Translation at the same time – the Starlink router and the personal router. That conflict causes strict NAT types on PlayStation and Xbox, lag in online gaming, dropped Zoom and Teams calls, and work VPNs that refuse to stay connected. With Starlink Bypass Mode enabled, the personal router handles all NAT functions alone and those problems disappear. This alone is worth the switch for gaming setups and home offices.
2. Better Wi-Fi Range and Speed
The included Starlink router is decent for a small apartment but can’t match a modern Wi-Fi 6 or Wi-Fi 6E mesh system. My home has thick walls and a detached office, and coverage was spotty with the stock hardware. After moving to a mesh system in bypass mode, coverage reached every corner, local file transfers got faster, and speeds stayed consistent even with more than 20 devices connected.
3. Access to Advanced Networking Features
The stock router is intentionally simple. In bypass mode with a quality third-party router, advanced features become available: Quality of Service (QoS) to prioritize work calls over streaming, robust parental controls, custom DNS like Cloudflare 1.1.1.1, dedicated guest networks, VLAN support, and proper VPN server and client configuration. These are features that many remote workers and power users need daily.
4. More Stability During Firmware Updates
Starlink pushes firmware updates regularly. On the stock router, those updates cause a full network reboot that can cut off anything you are doing without warning. In bypass mode, the internal network stays up because the personal router keeps running. Only the external internet feed drops briefly, so devices stay connected to each other and reconnect faster.
What You Need Before Enabling Bypass Mode
- A third-party router: Any quality router or mesh system will work.
- An Ethernet connection: Gen 3 and Starlink Mini have two built-in Ethernet ports under the kickstand on the back. Gen 2 rectangular actuated dishes require the official Starlink Ethernet Adapter.
- The Starlink app: Updated to the latest version on your phone.
Do not enable bypass mode until the new router is physically connected and powered on, or internet access will be lost.
How to Enable Starlink Bypass Mode: The Process I Use
- Connect the new router first: Run an Ethernet cable from the Starlink router’s Ethernet port (or adapter) to the WAN / Internet port on the personal router. Power on the new router and wait 2 minutes for it to fully boot.
- Open the Starlink app: Go to Settings > Advanced. The app will show the Bypass Mode toggle.
- Enable Bypass Mode: Switch the toggle ON and confirm the warning that Starlink Wi-Fi will be disabled.
- Reconnect devices: The default STARLINK Wi-Fi network will disappear. Connect all phones, laptops, TVs, and smart home devices to the new router’s Wi-Fi. Starlink is now operating as a pure internet feed.
There is also a web option at my.starlink.com > Manage > Wi-Fi Settings > Bypass Mode.
How to Turn Off Bypass Mode and Revert to Stock
To go back, a factory reset is required:
- For Gen 2: Unplug the power from the Starlink router and plug it back in 6 times quickly, with 2-3 seconds between each cycle. The default STARLINK network will return.
- For Gen 3+ and Mini: Locate the small reset button on the back of the router. Press and hold for 10+ seconds with a paperclip until the light blinks, then release and wait for reboot.
Troubleshooting From My Experience
Can’t find the network after reset? Move closer to the router and look for default names like STARLINK. In crowded Wi-Fi areas, use the scan feature inside the Starlink app to reconnect.
New router shows no internet? Check that the Ethernet cable is in the WAN port, not a LAN port. The most reliable sequence I use is to reboot Starlink first, wait two minutes, then reboot the personal router.
Does it work with Starlink Mini? Yes. Bypass Mode is available on the Mini and is ideal for RVs, vans, and portable setups where a small travel router provides better range while keeping the flexibility of the Mini.
Final Verdict: Should You Enable It?
For casual browsing and streaming on a couple of devices in a small space, the stock router is fine. For a home office, serious gaming, daily VPN use, or a larger home that needs mesh coverage, Starlink Bypass Mode is worth enabling. In my setup it took less than five minutes and solved double NAT issues while unlocking the performance and features that a quality router is built to provide. I recommend it if the current setup feels limited.