
From Headless to Headful: Turning My Old Mac Mini into a Home Assistant Dashboard with HAOS-kiosk
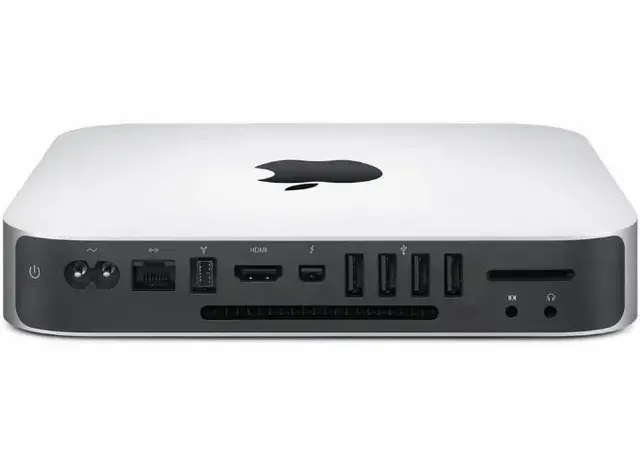
When I first put Home Assistant bare-metal onto an old Apple Mac Mini I had lying around in the closet, I was convinced it was going to be a headless server. Install HAOS, tuck the Mini into the closet, never look at it again, and do everything from my daily driver PC on my home LAN.
That plan worked, until I realized I had a perfect little computer with an HDMI port sitting right on the other side of the wall where a status display would be perfect.
Then I found HAOS-kiosk by puterboy in HACS. It’s an App – now called an App instead of Add-on in Home Assistant 2026.8 – that launches Xserver and a kiosk browser directly on your HAOS machine.
I plugged a monitor into the Mini, installed it, and now the Mini is parked 24/7 on a particular dashboard that shows real-time data from my home automation system, Hubitat – indoor and outdoor temps, lights, switches, and more. My daily driver can still browse any other dashboard or the Settings pages completely independently. The kiosk is its own session.
HAOS-kiosk is solid. It works perfectly on Intel hardware like the old Mini, and it is genuinely easy to install.
Installation on Home Assistant 2026.8
The menus changed recently. On the latest Home Assistant:
Settings > Apps > Install app > three-dot menu ⋮ > Repositories
Add https://github.com/puterboy/HAOS-kiosk > Add.
Back in the App Store search for HAOS Kiosk > Install.
Go to Settings > Apps > HAOS Kiosk > Configuration.
The One-Time-Only Configuration
You actually only need to fill in three fields:
- HA Username / HA Password: A dedicated Home Assistant user. You must enter a valid user and password or the App will start and immediately stop. I made a
house-displayuser just for this. - HA URL: Enter it as
http://yourHAboxIPaddressbecause the browser is running on the HAOS box itself. - HA Dashboard: This is NOT a full URL. It’s just the path. If you can open your dashboard on your laptop at
http://192.168.86.23/hubitat-dashboard, then you put hubitat-dashboard in this field. If you leave it blank, it loads your default Lovelace dashboard. That’s it. Save and Start.
Scroll to the bottom of the page and click Save.
With just that, my Mini went from a CLI prompt to a full-screen dashboard in about 15 seconds.
All The Other Configuration Options – What They Actually Do
You can leave everything else at defaults and it will be fine, but if you want to fine-tune the view, here’s what the rest of the panel does:
Browser & View:
- Login Delay: Seconds to wait for the login page to load. Default 1.
- Zoom Level: 100 is 100%. I run my wall display at 125.
- Browser Refresh: Auto-reload the page every X seconds. Default 600.
- HA Theme: Force a theme name. Leave blank for auto.
- HA Sidebar: Show the left menu as Full, Narrow icons-only, or None. For a true kiosk, set it to None.
- Dark Mode: Prefer dark mode where supported.
Display:
- Screen Timeout: Seconds before the screen blanks. Set to 0 to never blank. This is your always-on setting.
- Output Number: Which physical video port to use. 1 is first connected. On a Mac Mini with both HDMI and Thunderbolt, you may need to try 2 if you get a black screen.
- Rotate Display: Normal, Left 90, Right 90, Inverted 180.
- Cursor Timeout: Seconds before the mouse cursor hides. 5 is default, 0 is always show, -1 is never show.
- Xorg.conf: Append or replace your xorg.conf. You almost never need this on Intel Mac hardware.
Inputs & Audio:
- Keyboard Layout: us by default.
- Onscreen Keyboard: On by default. It pops up when you tap a text field. You dismiss it by tapping the extreme top-right corner of the screen, triple left-clicking your USB mouse, or pressing Ctrl+o on a keyboard. If you have a real mouse and keyboard plugged into the Mini, just set this to False.
- Save Onscreen Config: Whether it remembers moves/resizes you did to the on-screen keyboard.
- Audio Sink: Auto, HDMI, USB, or NONE.
Power User Features:
- REST IP / REST Port / REST Bearer Token: HAOS-kiosk runs a REST server on localhost:8080. This is how you rotate between dashboards automatically. Use
launch_urlto change what it’s showing,display_on/off,refresh_browser,screenshotand more. You can then create a Home Assistant automation to call it every 60 seconds. - Gestures: Map touch or mouse gestures to internal commands like
kiosk.back,kiosk.forward,kiosk.refresh_browser,kiosk.launch_url,kiosk.toggle_keyboard. - Command Whitelist Regex: Which shell commands are allowed for gesture actions.
- VNC Server: Set a password and it launches a VNC server on port 5900 so you can view or debug the kiosk remotely from your laptop.
- Debug: Launches X and openbox but doesn’t launch the browser, so you can debug inside the container.
The App also supports any standard USB or wireless mouse or keyboard connected to the HA box.
I couldn’t be happier with HA-kiosk. Since my Mini has a secondary video port, I may connect an additional monitor.
For more about how Hubitat integrates with Home Assistant, see my integration blog post.