
Which is the best hardware for Home Assistant? If you search Reddit or YouTube, you’ll get 20 different answers: Raspberry Pi 4, Pi 5, Intel NUC, Beelink mini PC, VM on your NAS, old desktop — to name a few. Here’s what actually worked for me — a simple, fast, and cheap bare metal install on hardware I already owned.
First and foremost, I wanted a bare metal install. I didn’t want to add complexity with a VM, Proxmox, or Docker layer that I would have to maintain. I wanted Home Assistant OS (HAOS) to own the entire machine so it could be reliable, restart cleanly after power loss, and just work.
Why I Chose Bare Metal for Home Assistant
Virtual machines are great if you are already running a homelab. For me, they were overkill. A bare metal Home Assistant installation means fewer moving parts, direct hardware access, lower latency for USB coordinators if you need them later, and no hypervisor updates to break things. If your goal is a home automation appliance, not a new hobby in virtualization, bare metal is the simplest path.
The Best Hardware for Home Assistant Doesn’t Have to Be New
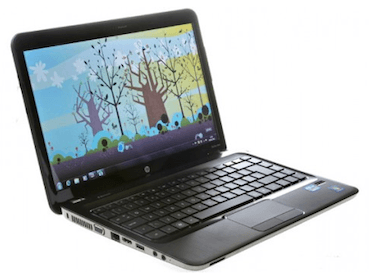
I had a 2012 HP Pavilion laptop sitting in a closet collecting dust. Instead of buying a new $300-$600 mini PC, I decided to repurpose it. This turned out to be the best hardware for Home Assistant for my use case.
My 2012 HP Laptop Specs After a Cheap Upgrade
- Base Machine: 2012 HP Pavilion BW-series laptop
- RAM Upgrade: From 8GB to 16GB DDR3
- Storage Upgrade: Removed old 500GB HDD, installed a 512GB SATA SSD
- OS: Home Assistant OS (HAOS) bare metal
- Networking: Wired Ethernet with IP reservation
This gives me more than enough headroom to run anything I could envision under Home Assistant — dozens of integrations, complex automations, and multiple dashboards — without ever worrying about CPU or RAM.
Why an Old Laptop is Perfect for Home Assistant
There are three reasons an old laptop is often better than a 【entity-Raspberry Pi¦canonical_name=Raspberry Pi】:
- Built-in UPS: The battery keeps HA running through short power blips.
- Built-in Screen & Keyboard: Makes troubleshooting a bare metal install much easier.
- Thermal & Power Efficiency: Laptops are designed to run cool and quiet 24/7.
| Hardware Option | Pros | Cons |
|---|---|---|
| Raspberry Pi 4 / 5 | Cheap, low power | SD card failures, needs extras, can be underpowered |
| Mini PC (N100, etc.) | Fast, efficient, small | Costs $150-250, no battery backup |
| Old Laptop (My Pick) | Free/cheap, battery backup, screen included, powerful enough | Larger footprint |
| VM on NAS / Server | Consolidates hardware | Complex, dependent on host, harder restores |
How I Installed Home Assistant OS Bare Metal
The bare metal installation was easy and quick. I followed the official guide from Home Assistant for generic x86-64.
I flashed the HAOS image to a USB stick using Balena Etcher, booted the HP laptop from USB, and installed to the internal SSD. After the first boot, I made an IP reservation in my Wi-Fi router for the new machine so it always has the same address. After a few minutes, HA finished updating and setting up. Total time from USB boot to working UI: about 15 minutes.

My Core Home Assistant Setup and Integrations
Since all of my Zigbee, Z-Wave, and Matter devices are already running within my Hubitat Elevation system — and it is rock solid — I didn’t want to migrate radios. I wanted Home Assistant to be the brain and dashboard layer.
Here is what I installed first:
- Hubitat Integration: Brings all my Hubitat devices into HA instantly with two-way sync. This saved me hours of re-pairing.
- HACS (Home Assistant Community Store): Essential for custom integrations and frontend cards.
- Advanced SSH & Web Terminal: For safe, direct access when I need it.
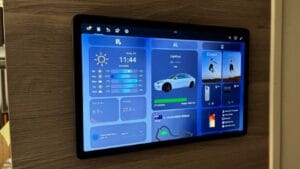
- HAOS Kiosk Display: Lets me turn any old tablet or the laptop screen itself into a wall dashboard.
Supercharging My Build with OpenCode and Big Pickle AI
To supercharge my HA build out for dashboards, automations, and templating, I installed OpenCode and chose the free AI agent, Big Pickle.
I can’t stress how much OpenCode has elevated my Home Assistant installation as well as my understanding of how to get some really complex stuff done WITHOUT going nuts while trying to write YAML.
How AI Helps Avoid YAML Headaches
I do not look at Home Assistant as my life-long hobby. I want HA to be a very useful tool in my household. Anything that can help me achieve that is welcome. Big Pickle and I get along famously. I can describe what I want in plain English — “Create a dashboard for the living room with lights, temperature, and a button that runs the movie night scene, and make it auto-dim after 10pm” — and it scaffolds the YAML, Lovelace cards, and helpers for me. I then review and tweak, instead of starting from a blank page and Stack Overflow.
If you struggle with Jinja2 templates, complex automations, or custom button cards, an AI coding assistant inside HA is the best hardware for Home Assistant upgrade you can make — because it upgrades YOU.
Backups and Reliability: Don’t Skip This
The one thing that will kill any Home Assistant setup, no matter what hardware you choose, is not having backups. I set up a daily automation to backup to two places:
- Local disk (the SSD itself) for quick restores
- Dropbox for off-site protection using the Dropbox backup integration
With the laptop battery acting as a UPS, plus daily backups, I have had zero unplanned downtime in months.
Final Thoughts: Is This the Best Hardware for Home Assistant for You?
So, what is the best hardware for Home Assistant? For me, it was the free laptop in the closet. It boots fast, runs completely silent, sips power, survives power blips, and has 8x the RAM of a Raspberry Pi.
If you have an old laptop (2012 or newer) with at least 8GB RAM, upgrade it to an SSD and 16GB if you can, and run HAOS bare metal. If you don’t have one, a used N100 mini PC for $120 is the next best thing. Avoid SD cards, avoid over-complicating it with a VM unless you already manage a homelab, and invest your time in automations that actually help your family — not in maintaining the server.